Recreating the water physics from Mario Kart World
I have been playing the new Mario Kart World game recently. During the water sections, I noticed that bob-ombs could cause large waves to appear that interact with the players. I have wanted to work on a technical art project for a while now, so I decided to implement a version of their interactive ocean system for myself. Additionally, I implemented many other effects featured in the latest Mario Kart installment, such as item boxes, boost panels and tire tracks in the sand.
As per usual, I have open sourced everything under the MIT licence, so feel free to have some fun with it.
this project uses some code from various open source codebases, please refer to sources at the end
Water System
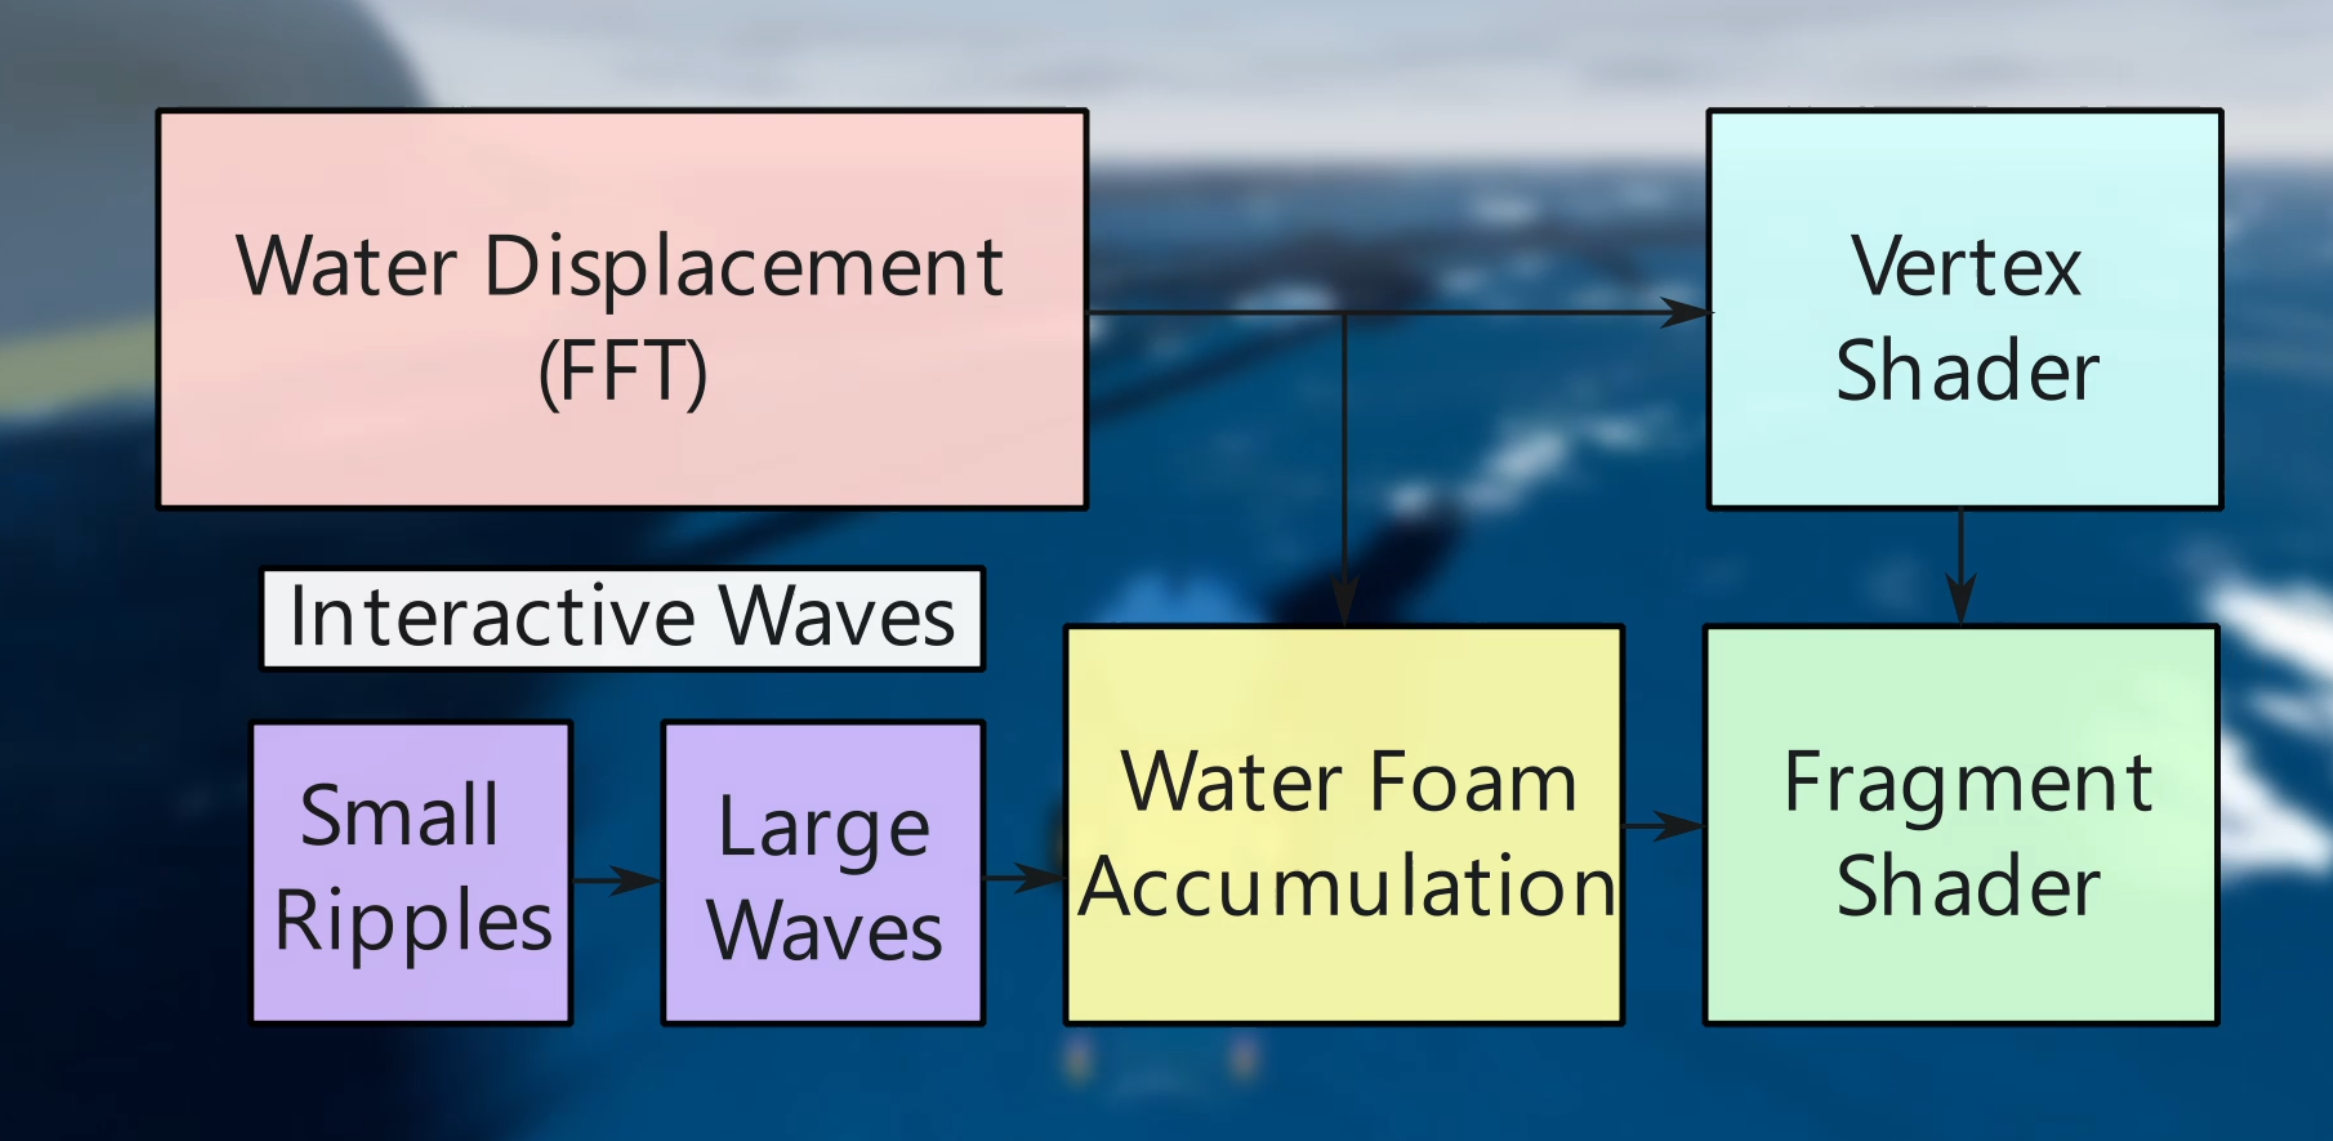
The water system is an amalgamation of many effects. First, we compute general wave displacement, independent of any interaction, using the fast fourier transform. Then, we layer two interactive wave systems on top of it. One to model small ripples, and one to model large waves caused by major disturbances. We also accumulate foam based on what is happening to the surface. Finally, in the vertex and fragment shaders, we combine it all, and add some additional effects such as caustics and depth based foam.
FFT Waves
First, let’s tackle the ocean waves. Of course, we could just simply take some sine waves with unique frequencies, phases and offsets, and add them up to get a more interesting signal. However, to get anything detailed enough for a large ocean, we need a lot of sine waves. Instead, we can use the fast fourier transform. This part of my implementation is mostly based on the OceanFFT repository[2].
In essence, we have the following pipeline. First we initialize the amplitudes of each wave. This looks like setting a pixel value in a texture to the correct amplitude, using the JONSWAP spectral model for instance. Then, we initialize random phase offsets and update them every frame to animate the waves. Finally, we apply the FFT to transform the frequency-domain wave data into spatial displacement vectors for the water surface. On the GPU, this is easily achieved via a horizontal pass followed by a vertical pass, with each pass requiring log₂(grid size) shader calls. Once both passes are complete, we can now sample the resulting texture for the wave displacement. By packing two real-valued signals into a single complex input, we can compute both horizontal and vertical displacement in one FFT pass.
To afford redoing this every frame, we want to keep the computation time to a minimum, despite it being efficient. One such optimization is to use three cascades of increasing world scale using the same smaller texture sizes each, as opposed to handling one large texture. For our final displacement, we just sum the result of these three textures. It is crucial that these cascades each cover a unique non-overlapping frequency band, to prevent artifacts when summing their results.
Interactive waves
Overall the FFT ocean system is both effective and efficient at creating dynamic large scale oceans, and it generally beats the performance of simply summing thousands of sine waves in a vertex shader. However, this system only supports a static set of waves that cannot be easily influenced in ways I had in mind.
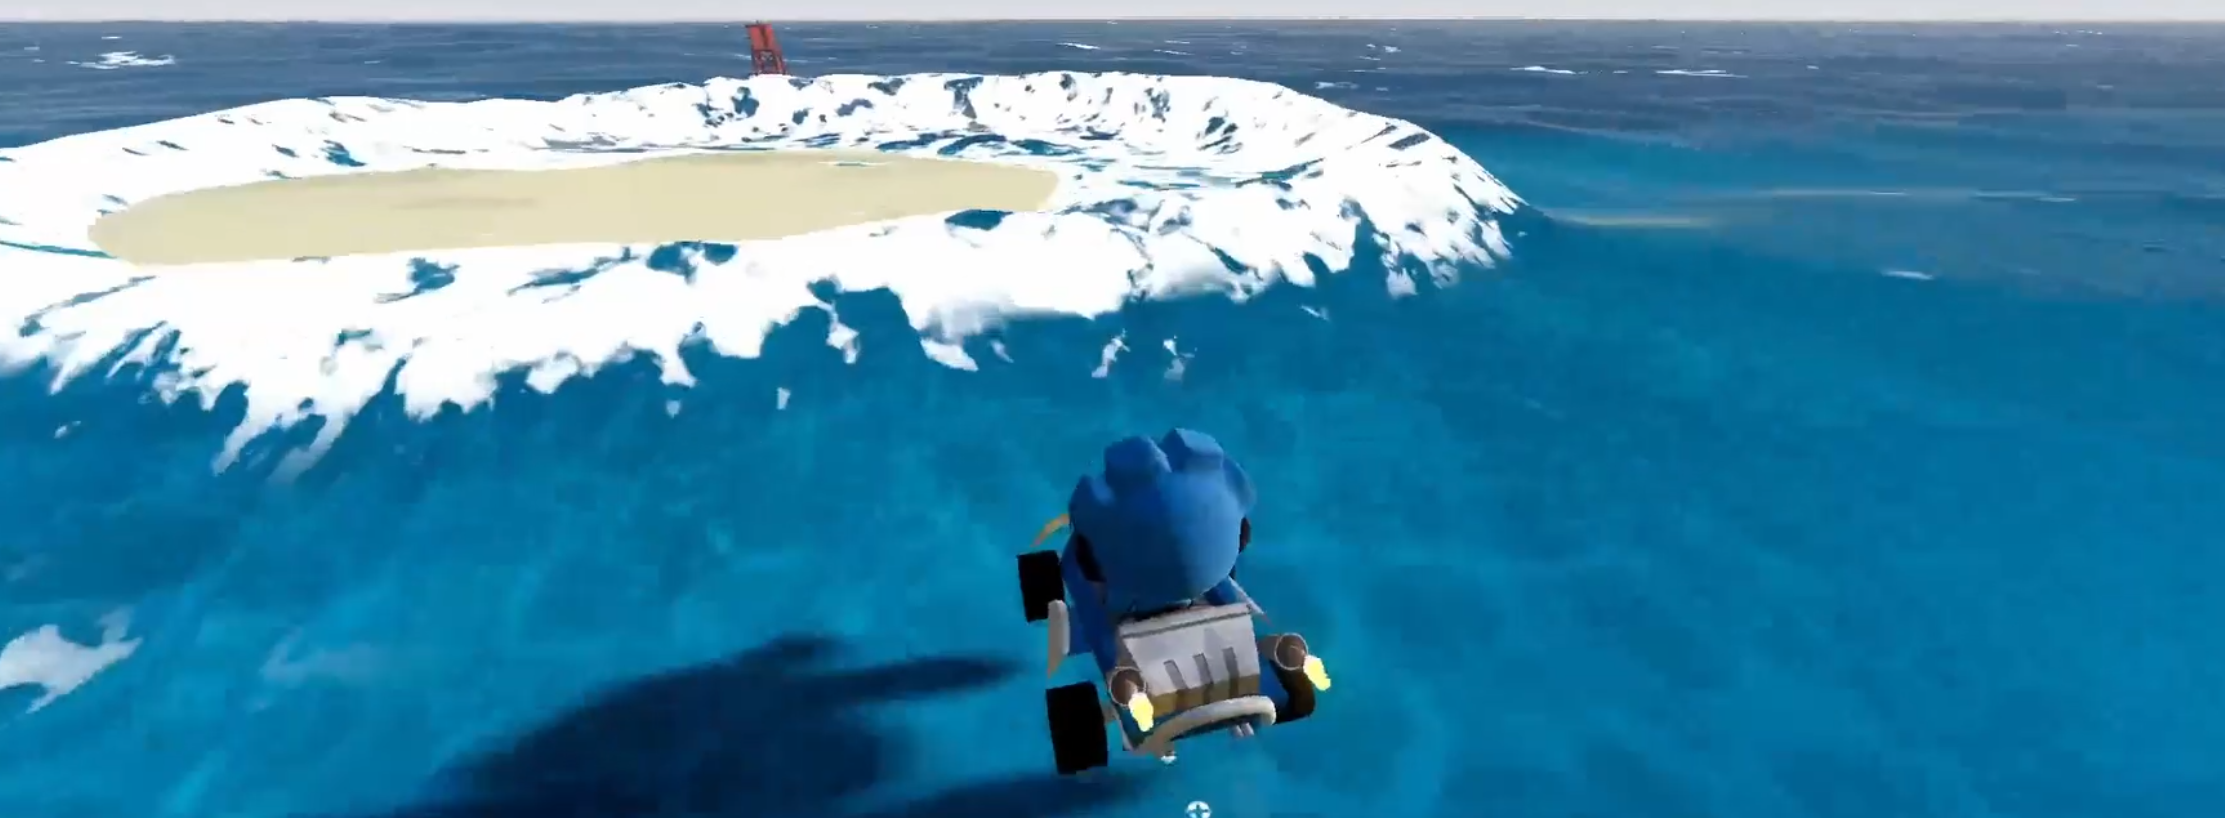
To this end, we can add another layer to our system, which models interactive waves propagating from objects in the water, once again, using a compute shader. The idea is to collect impulses as height disturbances, and write them to a texture[1]. We then apply a second-order wave equation using a discrete Laplacian that uses past states to evolve the surface height over time. In other words, we use the values of neighbouring pixels from the previous state and the value from two states ago to compute a new value for each pixel. We treat the edges as zero values, such that waves disappear when outside the bounds. We also damp the signal every frame to simulate energy loss.
As these effects are mostly just important around the player, I specify a bounding box in world space, centered around the player. This implies we also need to store offsets between every used state, and keep this in mind when updating the texture. This way, the waves remain grounded in global space, while maintaining a grid of data points around the player.
Foam
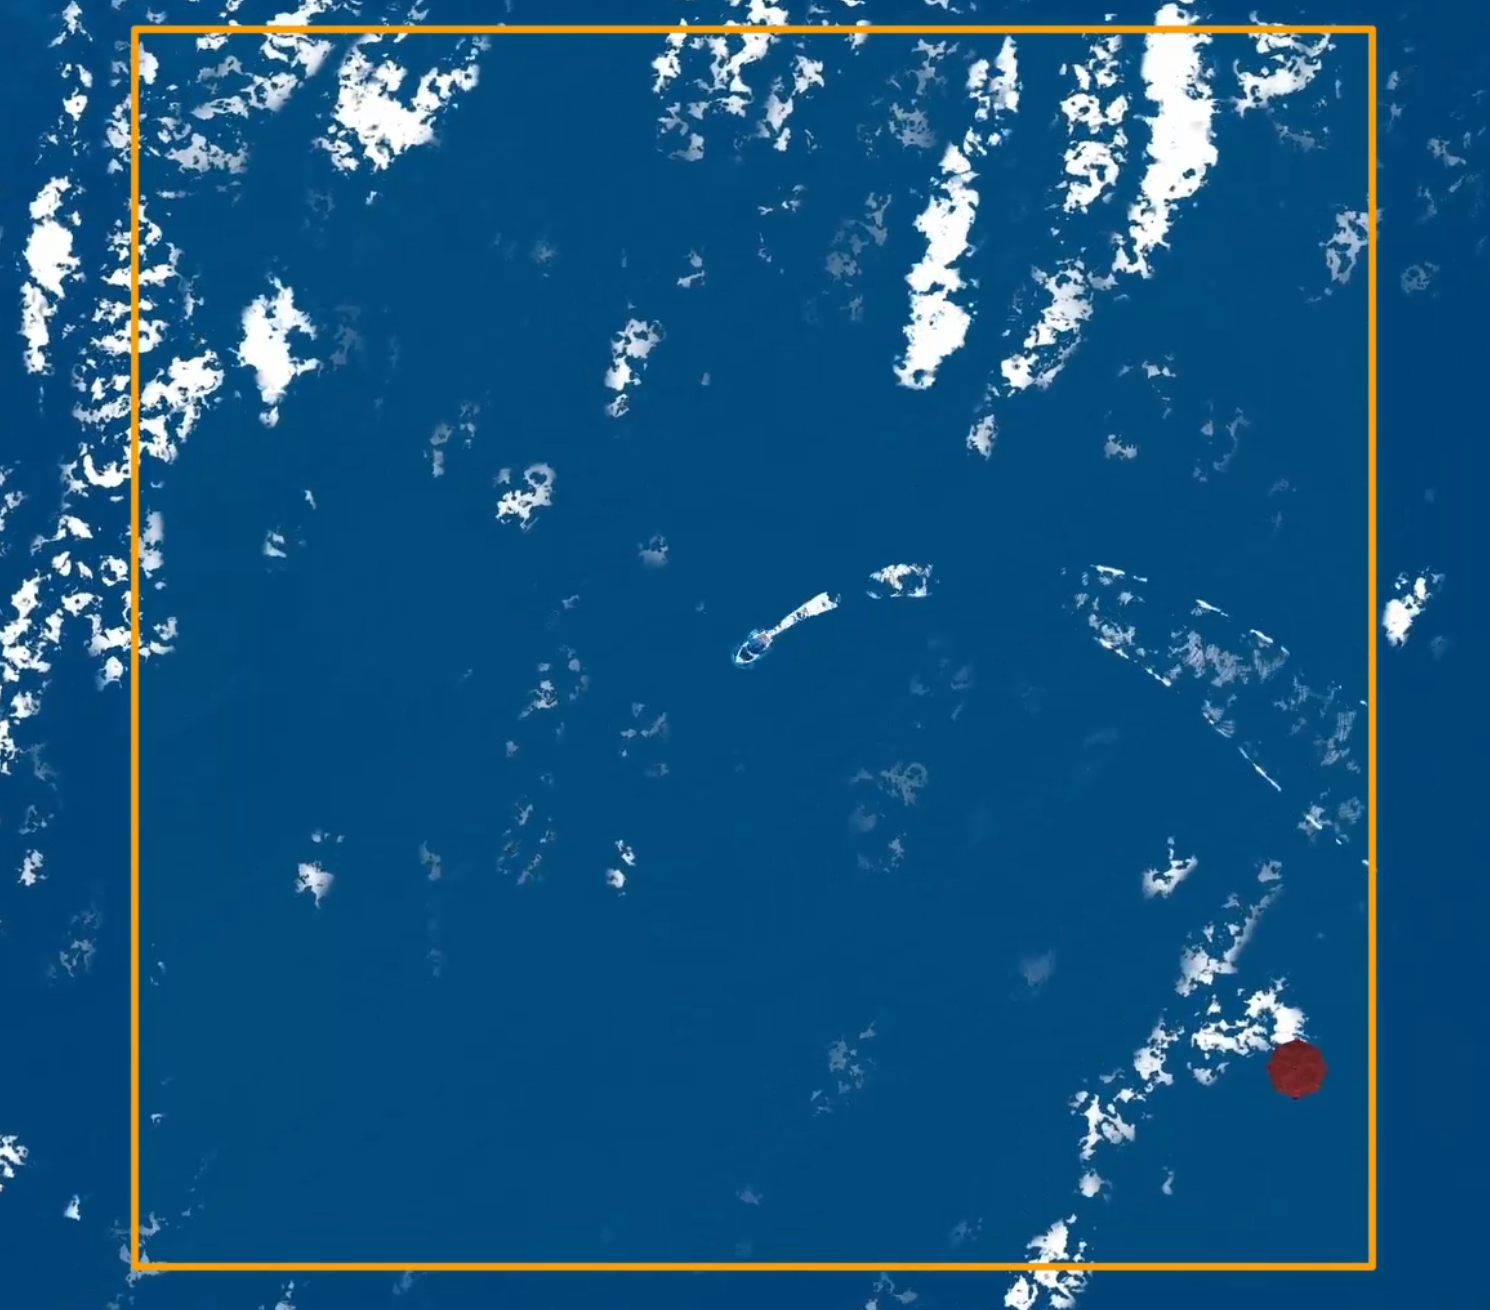
Disturbances to the ocean surface should cause foam to appear. For the FFT waves, we compute the Jacobian matrix of the displacement field at each pixel using finite differences. This matrix describes how a small patch of the space is locally stretched, compressed, or folded. If its determinant is negative, it implies local inversion, which we can interpret as the waves folding in on themselves. Thus, we make foam appear in those regions by writing to a foam mask texture in a compute shader. For additional control, we bias the determinant to add more or less foam.
For the other interactive waves, I simply add their amplitude to the foam mask, which works as these waves only appear where the water has been significantly disturbed. Just like with the interactive waves system, I center the foam mask texture around the player, and ensure that the data remains consistent in global space.
Water Shader
Now, we combine all these effects in one large water surface shader. First, in the vertex stage, we compute the displacement as the sum of the different types of waves, and apply it to each vertex. We also compute a new normal of the water surface based on the displacement. Using another texture, I attenuate the water displacement close to the shore, such that waves don’t clip through the island too badly.
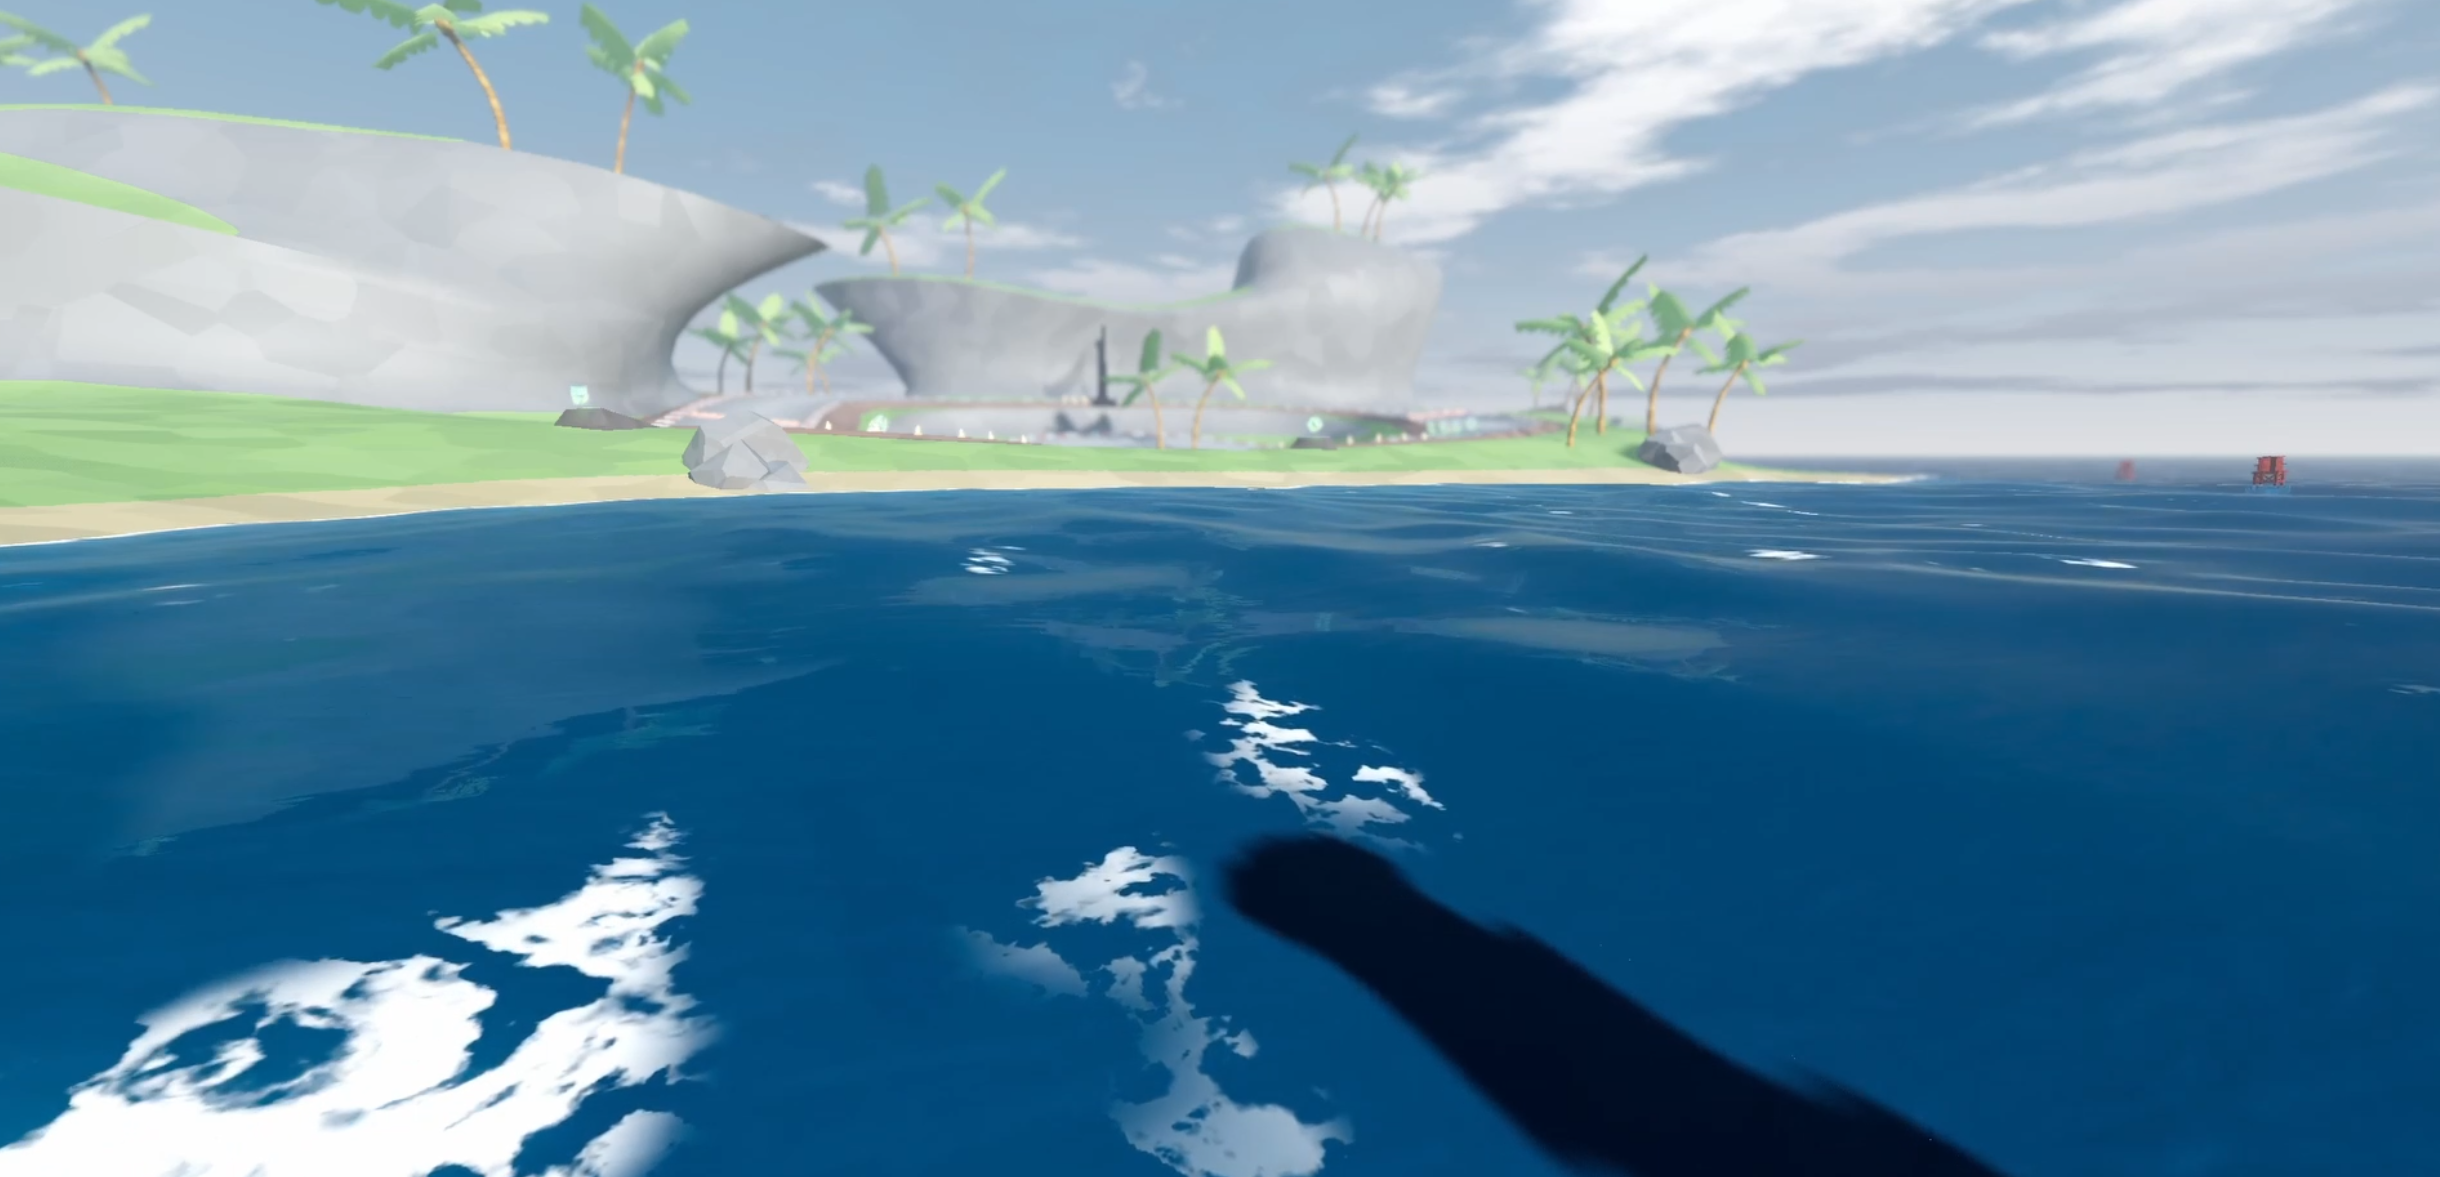
The fragment shader is a bit more involved, but here are some of the highlights. First, we compute the distance between the water surface and the geometry behind it. This is possible as we keep the depth texture of the opaque pass. We linearize this depth by undoing the projection into clip space, i.e. computing the view space coordinates of each depth value. This distance or water depth is then used to blend between a shallow color and a deep water color. When the water is shallow, it is also more transparent. We blend in the background using refraction, by sampling the opaque pass screen buffer with an offset based on the normal.
We also blend in foam. We combine the previously discussed foam mask with an additional layer of foam, near the shallow parts of the water. We use this combined foam mask to sample from a foam texture, projected onto the world xz plane. This texture is then used to blend between the water surface and the foam color.
Furthermore, I use the water depth to blend in caustics. We want the caustics to appear to sit on the geometry behind the water surface. To obtain this, we once again use the world position of the opaque geometry behind the current water fragment, and project the caustics texture on the xz plane of that. By sampling the same texture twice at different scales and offsetting it over time, we get a pretty convincing effect.
Similarly, I sample and scroll a noisy high frequency wave normal map twice, and combined I use them to increase the amount of detail without having to subdivide the water plane too much.
Finally, I added primitive screen space reflections. This is often done as a post processing effect, but godot does not support it for transparent materials. I therefore added it to the fragment shader, as it is pretty effective for water surfaces.
Water Buoyancy
While our water looks rather convincing now, we cannot float on it. For that, we need to implement buoyancy. The problem is that all our data is on the GPU, and we handle physics on the CPU. Every time we copy data from the GPU to the CPU, our main thread will stall until the data has been delivered. Luckily, we can copy everything asynchronously as well, at the cost of a slight delay.
Once we have all the data on the CPU, we essentially run the same code as in the vertex shader, but now at a given query position. We can make rigidbodies float by attaching several sensor nodes that query for the water height. The rigidbody can then sum the forces essentially as dampened spring forces obtained from the water depth of each sensor. For the player, I wanted it to feel slightly more arcadey. To this end I gradually transition the buoyancy code from a system like this, to one where it sticks to the water surface by interpolating its y position towards the water height.
Additional Effects
Other than the water system, I have made a couple more effects, here are some highlights. A core staple of the mario kart franchise is the item box. It is such a fun and mesmerizing effect, that I had to remake it for myself.
Item Boxes
First, I render a question mark using a billboard vertex shader. I just use a quad, but I discard all pixels under a certain alpha threshold in the fragment shader. The box itself is a simple bevelled cube with smooth normals, and it uses two distinct fragment shaders. For the first one, we only render the backfaces, i.e. the inside of the box. We use screen space UV coordinates to project a texture onto it, and we scroll it over time. However, using these coordinates directly means that the pattern greatly shifts when the camera moves. Therefore, we first center the uv coordinates by subtracting the screen uv position of the origin of the model, and finally multiply the uv coordinates by the distance to the camera.
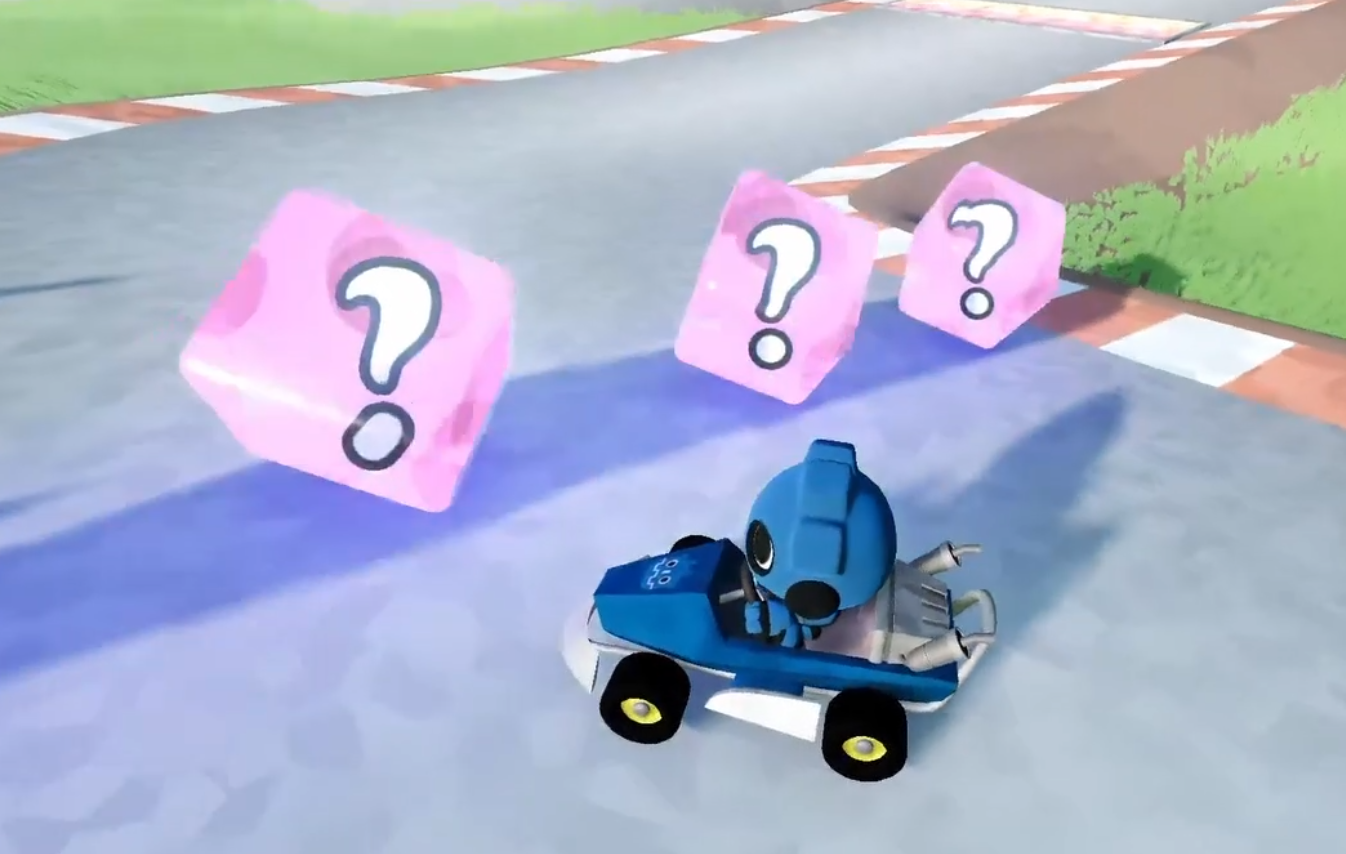
In a second pass that only renders the front faces, we use the opaque screen texture, and once again apply basic normal based refraction. Importantly, we want to render some strong specular highlights too, to really give the impression of it being a glass box. Finally, on the CPU we animate it by cycling through color hues, rotating it on all three axes, and moving it up and down slightly on the Y axis. Finally, we apply the color to a small pointlight at its center as well.
Boost Panel
Another recognizable element is the boost panel. It often features a gradient and scrolling arrows. In particular, in the latest installment it seems to use parallax mapping to give the arrows some depth. To achieve this, we need to compute a TBN matrix. This combines the tangent, bitangent and normal into a matrix that transforms vectors into tangent space. We use the TBN matrix to project the view direction onto the surface, which we in turn multiply by an offset factor, and use that to shift the UV coordinates. By sampling both the pattern and arrow textures multiple times with different offsets and blending them with color gradients, we obtain a glowing 3D layered effect.
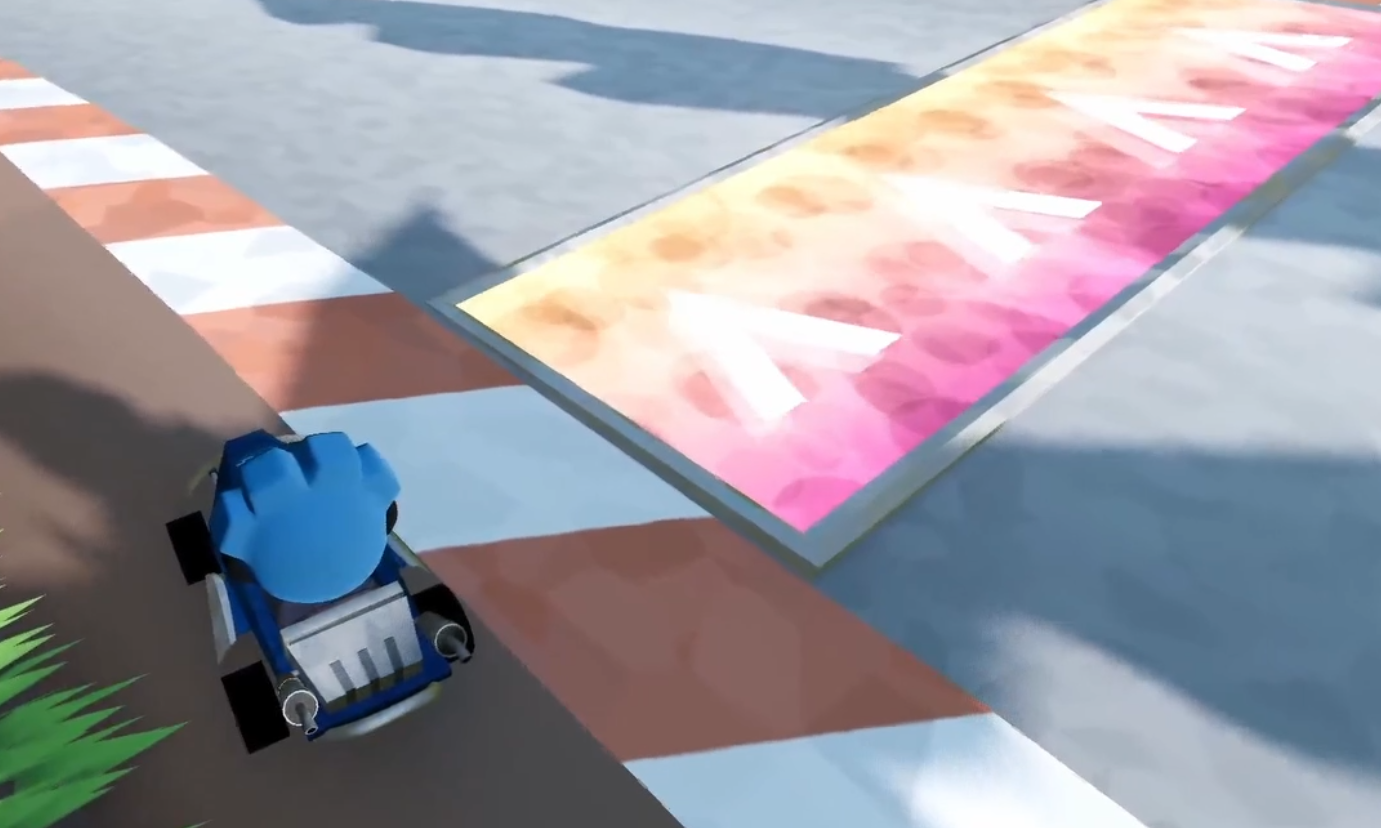
To scroll the arrow, we simply offset the UV y coordinate by the elapsed time. We can also make sure to point the boost panel away from the camera. For this, we simply project the camera’s world position into model space, and check its z coordinate. We flip the uv coordinates in the y direction if it is negative. By projecting into model space, it works no matter how the boost panel is transformed.
Tire Tracks
Tire tracks are another staple of modern racing games. In particular, I want the car to leave trails in the sand and grass. Much like the water ripples, we can handle this using a texture controller by simple compute shader. It reads the position of all four wheels every frame. For every pixel, we set it to one if the wheels are on it, or we slightly decrease its value every frame to prevent the entire world from becoming too messy. Then in the fragment shader, we use the texture to interpolate between the normal terrain color and a tire track color. To make the surface appear indented, we change the normal of the surface using a normal vector estimated using the central difference method.
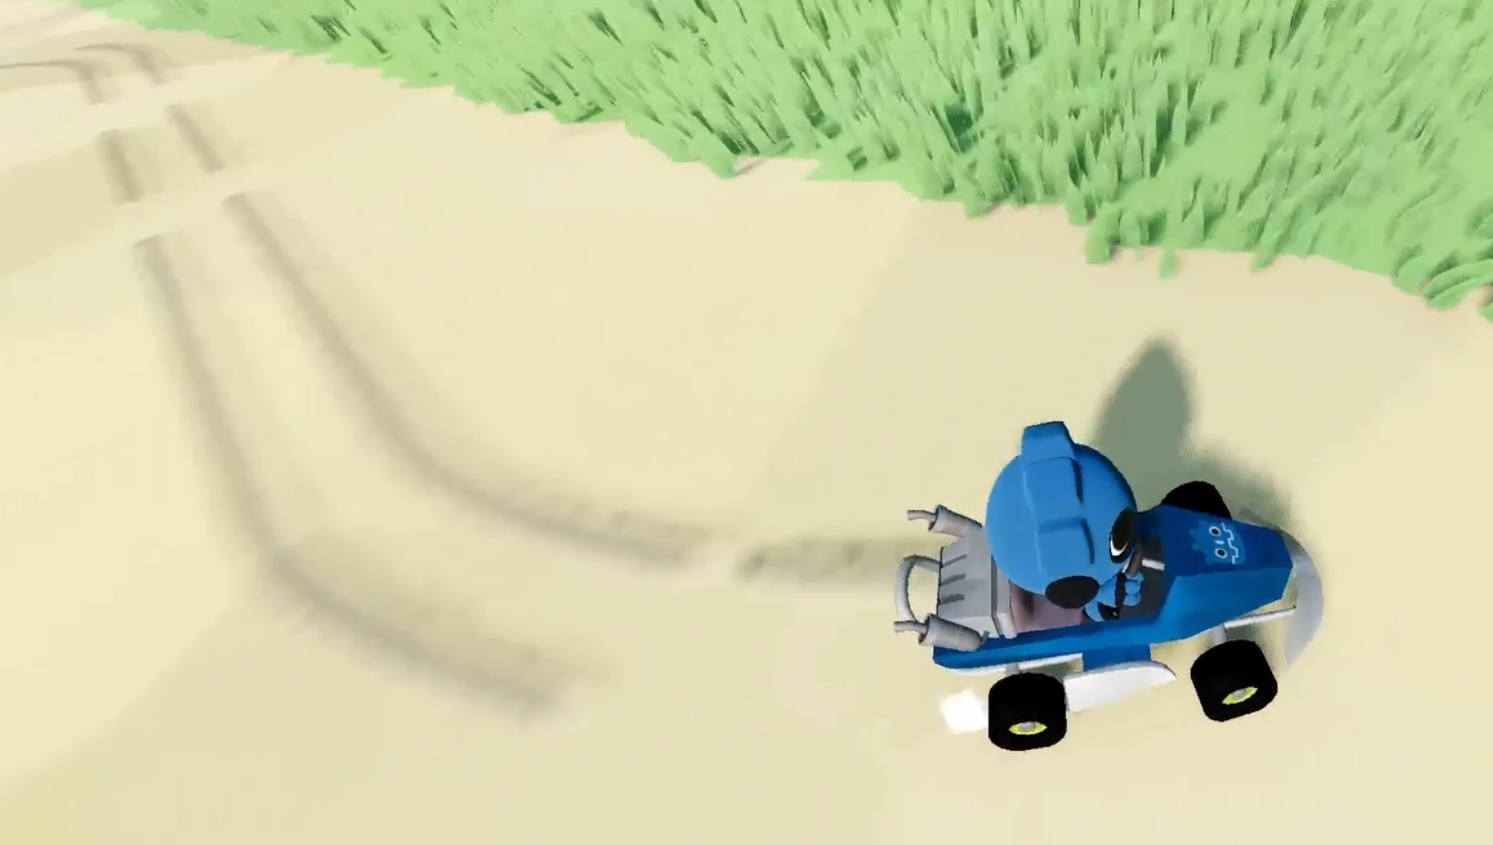
The grass shader also uses the tire track texture to displace itself vertically. I additionally use a wind texture to sway it around in the wind, same with the trees.
Finishing Touches
Finally, I made some simple particle effects for drifting, boosting and explosions. As a final cherry on top, I 3D modelled some assets such as the kart, island and some obstacles. Additionally, I put GDQuest’s Gobot character in the kart[3], holding the steering wheel using inverse kinematics.
Conclusion
Overall, I am quite happy with it. It was fun to work on a technical art project. While none of these implementations are perfect, I think they serve as fun examples of what is possible with some effort in the Godot game engine. Of course, I could add more effects, but I will move on to other projects for now.
Sources
- The official Godot compute texture demo.
- The Godot Ocean FFT addon:.
- The FFT related shaders are based on the OceanFFT project.
- GDQuest’s 3D characters
- Stylized Spatial Clouds by “sebashtioon” on Godot shaders.
- The screen space reflections handled in the fragment shader of the water are inspired by “smallcableboi” on Godot shaders.