Path Tracing
Update:
I’m thrilled to share that this project has been featured in the community section of the April 2025 edition of the official Godot newsletter!
Ray and path tracing is becoming more and more popular in real-time graphics. Many modern games release with ray traced reflections, and some games even attempt to have full path traced global illumination, essentially modelling light like in real-life. However, Godot lacks a good path tracing solution. Therefore, I had to dive in and make a simple renderer myself.
To render a basic picture with any ray based technique, we shoot a ray into the scene for every pixel on the screen. When doing simple ray-tracing, we might directly sample light from a hit surface, or bounce it for some reflections. However, for an even more realistic scene, we use path tracing. Here, we let rays bounce around and collect radiance, essentially following a path of light constructed from multiple consecutive rays. This is much like how light works in real life, except in reverse. If we try to collect rays from light sources instead, many rays would be wasted as they would never reach the camera.

Path Tracing is a direct solution to the intimidating looking rendering equation. This equation essentially says that the outgoing radiance or light at a position and direction equals the emitted light, plus the integral over all incoming light. With path tracing, we solve this integral not analytically, but using so-called monte-carlo integration. This effectively requires us to take many samples in the form of rays shot into the scene. This introduces variance in our estimate, which is why path traced images are infamous for being noisy.
Casting Rays
These rays have to somehow interact with the scene. Luckily, intersecting a triangle and a ray is well researched. Essentially, we compute if it intersects the plane spanned by the triangle, and if so, we compute the hit point in barycentric coordinates. We only count the intersection if it falls within the triangle’s boundary. To compute an intersection, we have to do this for every triangle in the scene, to find the closest hit point. However, you may realize that this would quickly become extremely slow, even if the triangle count is only in the hundreds.
So, what do we do? We use an acceleration structure. By building a Bounding Volume Hierarchy, or BVH tree, we can essentially do a binary search to find triangles that are likely to intersect with the ray. It works by dividing the scene into boxes. Each box can be divided into two smaller boxes. This happens over and over again, until there are only a handful of triangles in each box. We can do this once on the CPU, but to support dynamic meshes such as an animated player model, we would want to rebuild this every frame.
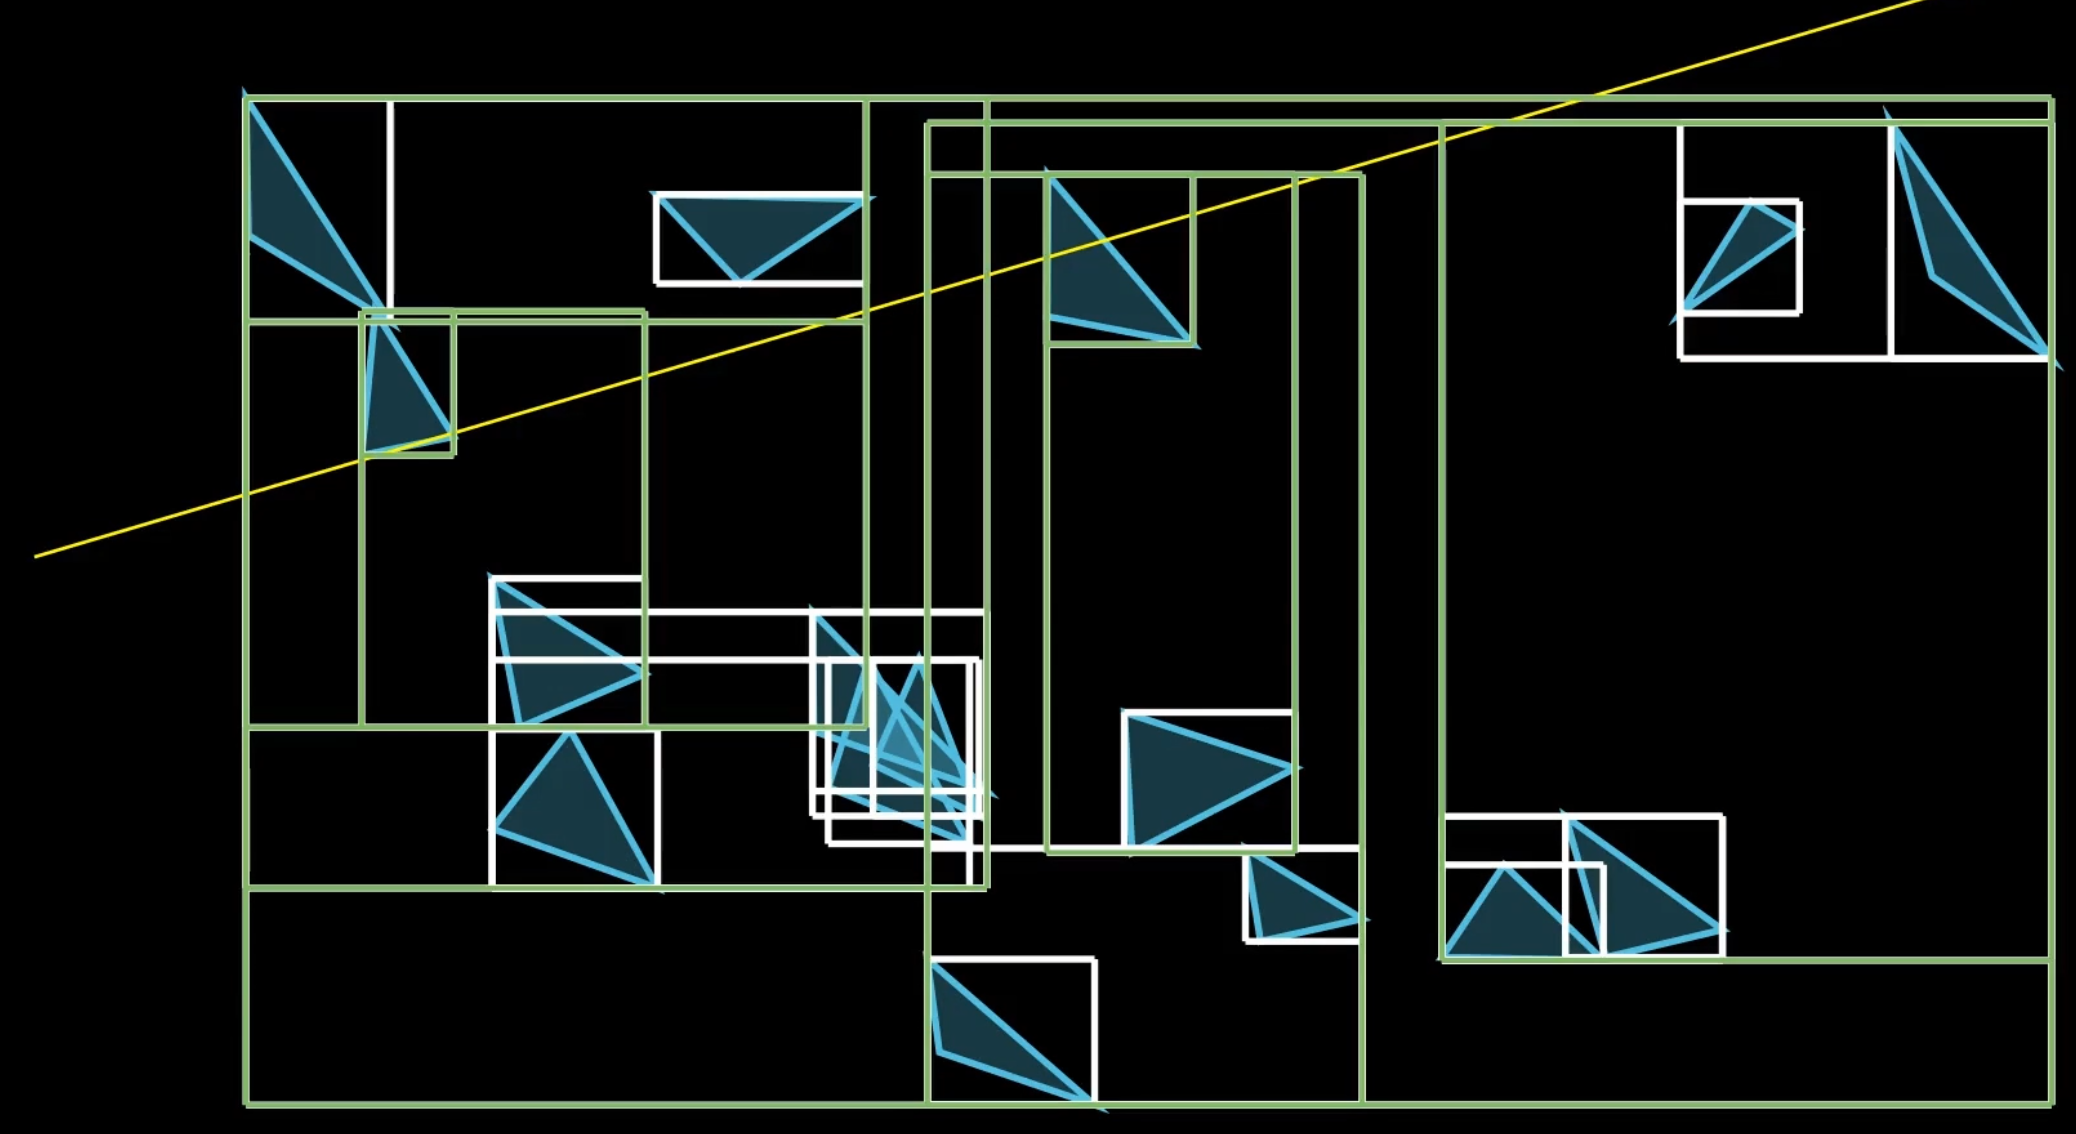
Then, to find an intersection with the scene, we go down the tree. We check only the branches of the tree if the ray intersects with the box. If it doesn’t, we know that the ray also cannot intersect with any of the triangles contained within it. Finally, we check the triangles in all the found leaf nodes for an intersection.
This part is actually the majority of what hardware ray tracing does as well. Nvidia’s RTX cards provide an API to build such BVH structures, and the hardware ray tracing cores will then compute the right triangle intersection given a particular ray. This is great, because now the SM cores can focus on the shading instead.
Shading
Speaking of which, how does shading work here? In a classic rasterization render pipeline, we create unique render calls for each distinct surface, with a particular set of geometry and some set of shaders to tell the GPU how to render it. The fragment shader then handles the appearance of each triangle. We don’t have that luxury here since a single light path may intersect with many materials, resulting in pretty indirect lighting. Instead, everything that describes the scene’s materials goes into one large shader. This means we require a powerful model that can describe most materials.
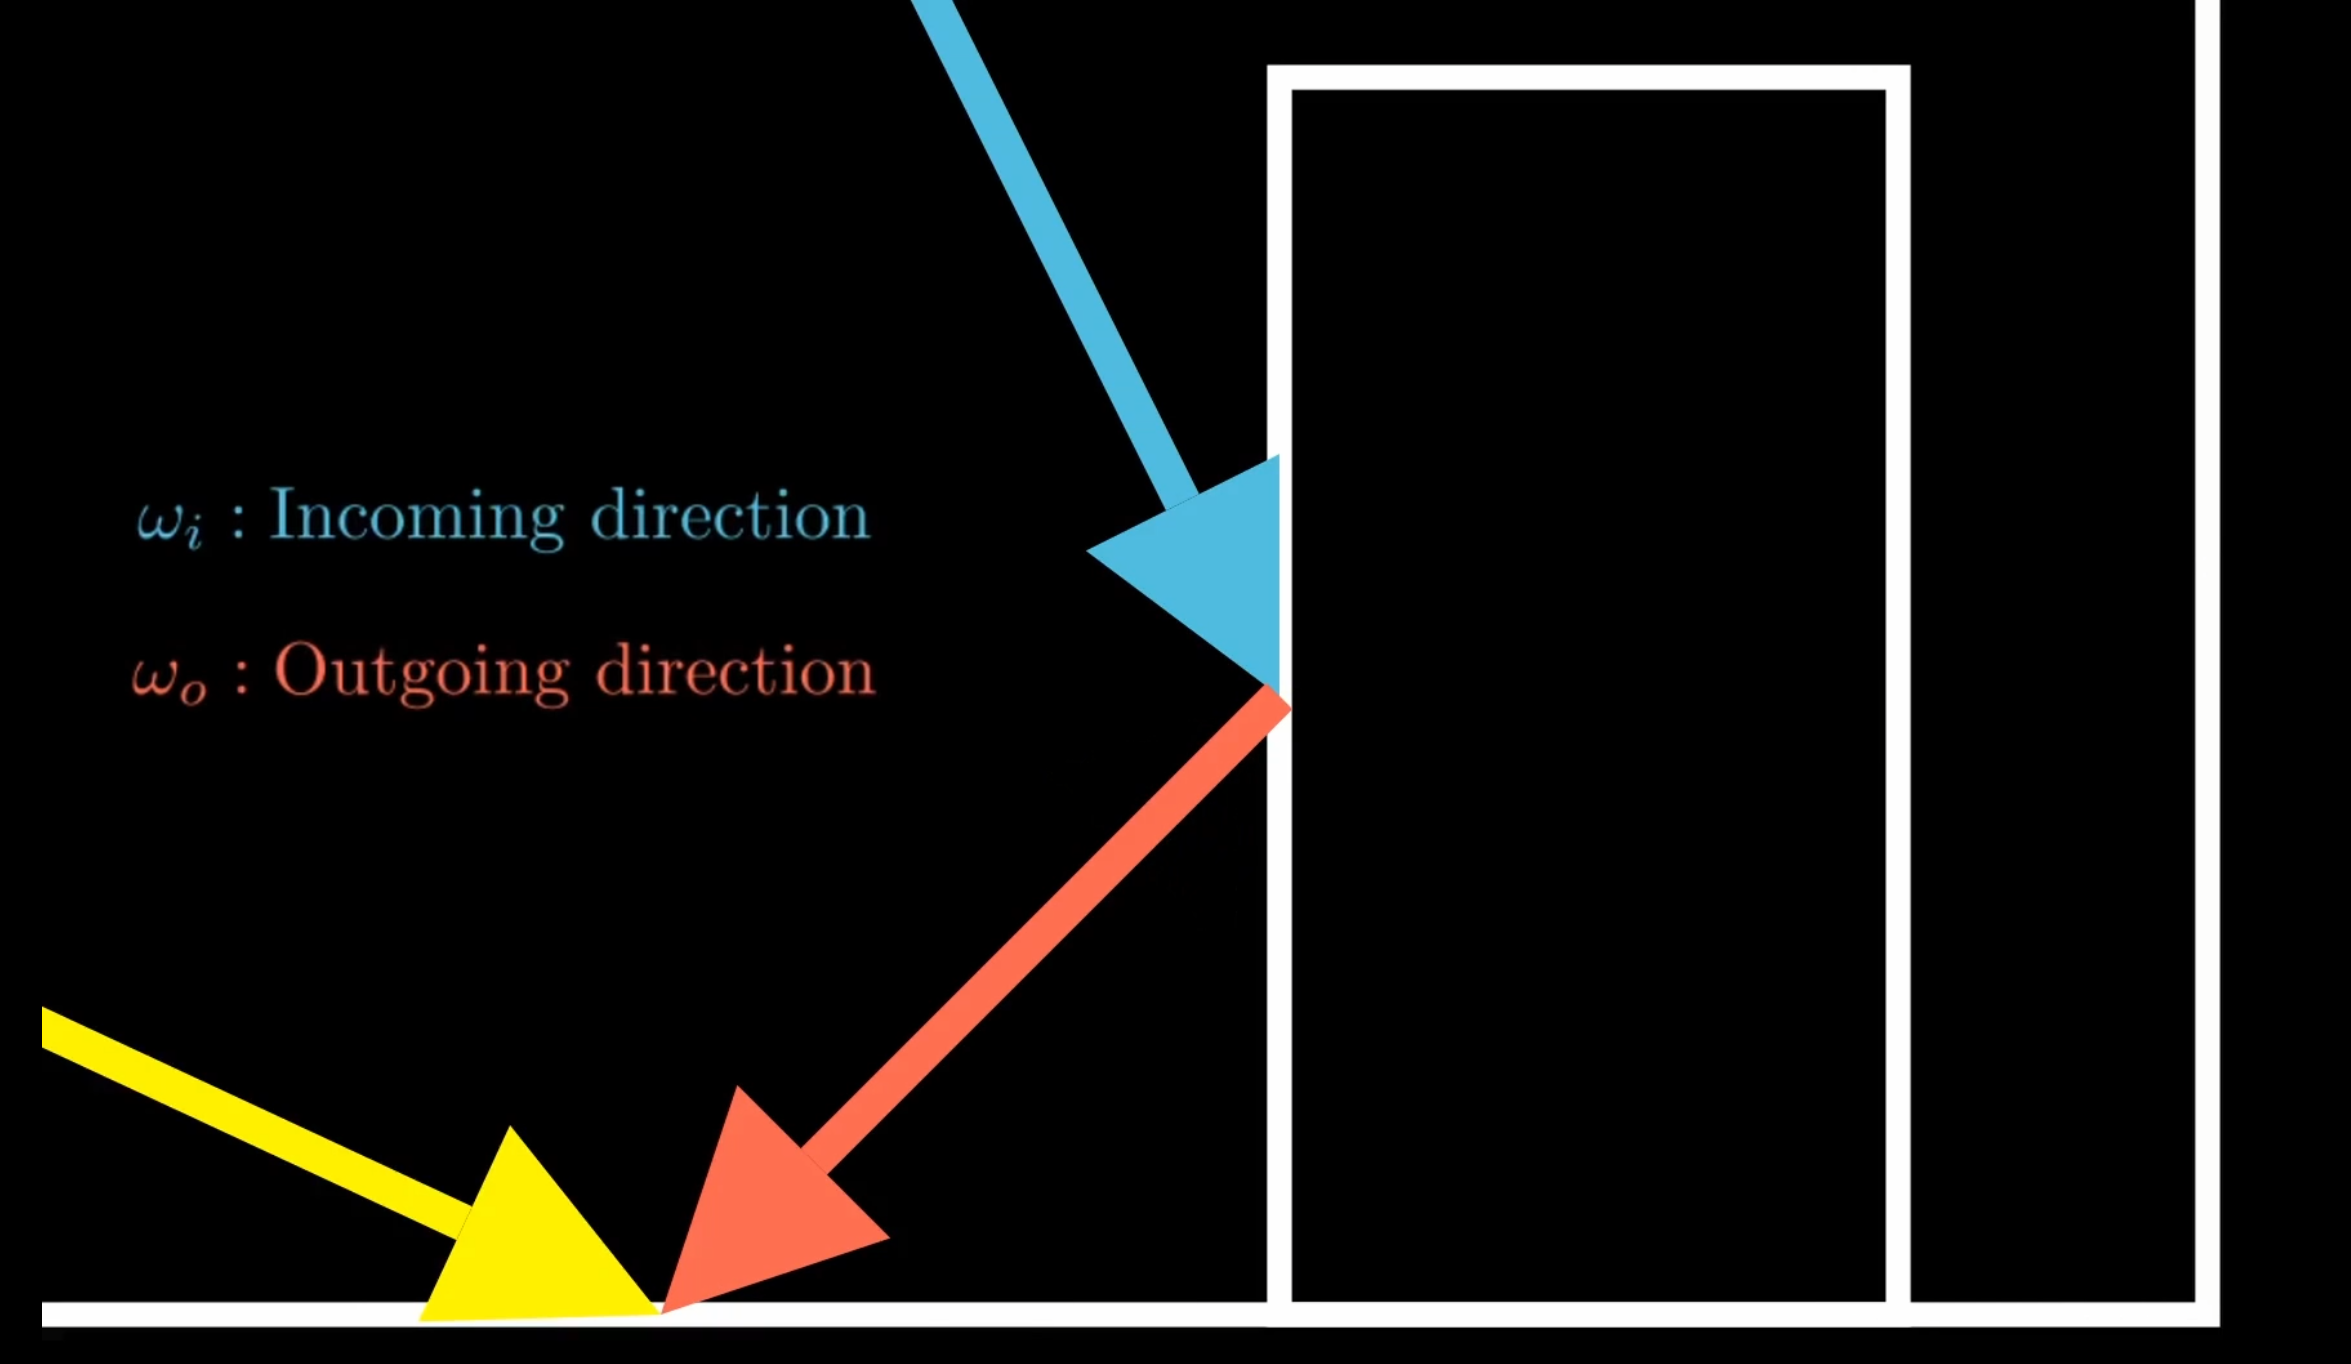
Enter the Bidirectional reflectance distribution function, or BRDF. It models how light reflects off a surface. If you remember the rendering equation, this part actually is the BRDF. It is a function of the incoming and outgoing angle at a certain position. This might sound confusing, but in actuality it’s precisely what we need. Remember that we compute our image by bouncing rays around the scene in reverse, or from the camera to the light. Well, the incoming direction can be the direction the ray travels in next, such as towards a light source, and the outgoing direction is where it came from, such as from the camera. This way, the BRDF will tell us how much light is reflected instead of absorbed by the surface along each step of the path of light we are considering at the moment.

The BRDF can also help us make decisions where to shoot rays towards. A diffuse BRDF scatters light evenly, but a specular BRDF has strong reflections. To compute the right radiance at a point more quickly, we can send more light rays to roughly align with the way the material scatters light, rather than sending rays in any random direction. In path tracing, this is referred to as importance sampling. We can also combine more sampling strategies, such as direct light sampling, and there we call it multiple-importance sampling. For brevity, I will not go into mathematical detail, but check out this amazing source for further reading. Keep in mind that we do not strictly need importance sampling, but it helps to reduce variance or noise at no increase in samples per pixel.
To make the scene truly look good, we want to vary material properties. Of course, we can simply create different material settings for each mesh in the scene, but it’s also nice to have some variance within each bit of geometry. We can achieve this with textures much like in rasterization. We need all these textures available to the shader at once. We can provide these in a texture sampler array. In Godot, I only got this to work if each texture has the same size and data format, which is fine for this project.
Overall, I am pretty happy with my implementation. It converts any mesh in a godot scene into an array mesh, and builds a BVH for each one. I have to handle this myself, as the ray tracing API is not exposed to Godot compute shaders as far as I am aware. On the upside, this does mean greater compatibility with more GPUs. It then creates a top level BVH that combines all the mesh instances. It also converts all the spatial materials into material structs that are read by my path tracer. Then, it renders the scene and accumulates samples while the camera is not moving, i.e. progressive rendering. I’ve made everything open source, so feel free to play around with it.